Tutorial: Hybrid Planning with PLANTA project and Jira
Introduction
Objective of this tutorial
- To teach first time users how PLANTA project and Jira can be used together to combine traditional and agile project management.
Please note:
- All exercises are based on the PLANTA demo data. This demo data must be installed beforehand.
- Before you start with the Jira tutorial, your PLANTA administrator has to set up a Jira system and connect it to PLANTA project.
- Please ask the administrator for the user and login data of the Jira system.
- The screenshots used in this tutorial are merely examples of functions and their layout may deviate from the actual layout in the program.
PLANTA project Create and Roughly Plan Projects
Create Project and Assign Resources to Tasks
Task
- Multi-project manager Georg Hart wants to plan a new IT project using PLANTA project and Jira.
- To do so, he first creates a project in PLANTA project and carries out the resource assignment.
Procedure
- Open the PLANTA project client.
- Login with the user name "r41" for Georg Hart.
- The Multi-Project Board panel is opened and the Projects module is focused automatically.
- Click on the New project button or select Multi-Project Management → Project Planning → New Project in the user menu.
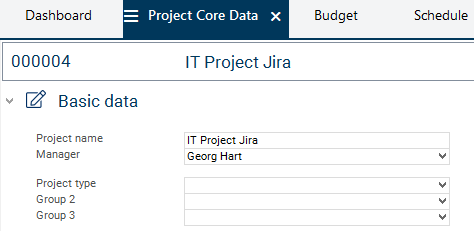
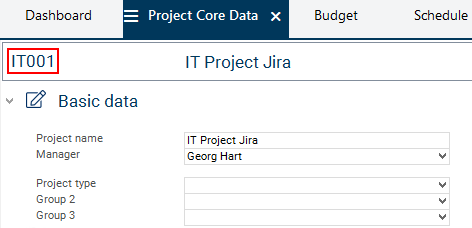
- The Project panel is opened with activated Project Core Data module.
- Enter a project name (e.g. “IT Project Jira”).
- Georg Hart is automatically entered in the Manager field. Do not change the entry, for he is to be the responsible project manager of the new project.
- Save. Result:
- Switch to the Schedule module.
- Answer the Do you want to copy a schedule? with Yes.
- Select schedule template A1.1 Standardplan IT-Projekt mit Sprints ("Standard schedule IT project with sprints") from the listbox in the Copy Schedule module.
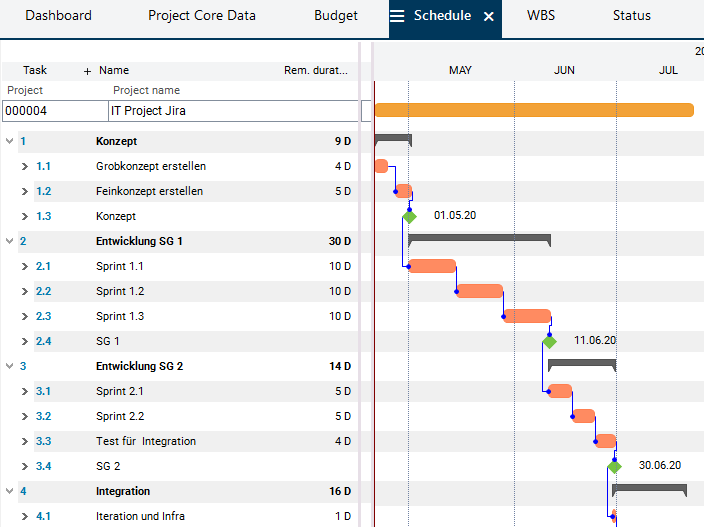
- Click on the Copy schedule button.
- Result:
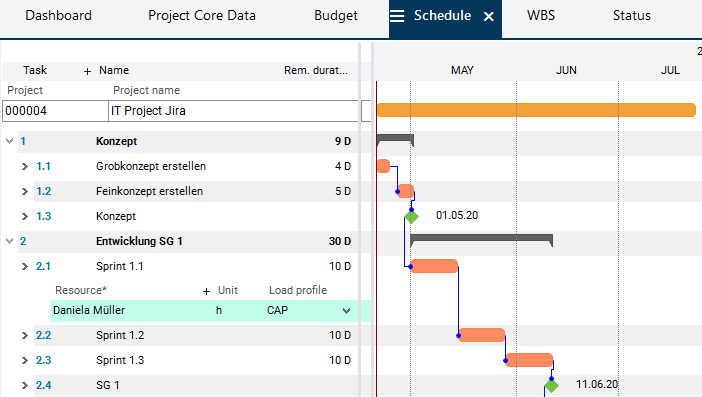
- Right-click on the Sprint 1.1 task to open the context menu and select the Assign resources entry.
- The Assign Resources module is opened.
- Activate the checkbox of the resource entry for Daniela Mueller.
- Click on the Assign selected objects button.
- Save.
Prepare the Project for Synchronization
Information
- The project must have been approved for editing before it can be connected to an external system like Jira. If the project is locked, an error message will be displayed when attempting to assign an external system to the project.
- Furthermore, the functional project ID needs to comply with the Jira-ID format, i.e. the functional project ID must begin with a letter followed by one or more letters or numbers. A maximum of 10 characters is permitted. Special characters are not permitted.
Task
- First, Georg Hart wants to change the functional project ID so that it complies with the Jira-ID format.
- Georg Hart then wants to approve the IT Project Jira project for editing and connect the project to the external system Jira so that the synchronization can be carried out afterwards.
Procedure
- In the Project Core Data module of IT Project Jira click on Change functional ID in the header area.
- Confirm the Do you really want to change the functional ID system wide? query with Yes.
- Enter a new functional ID (e.g. IT01).
- Save. The functional ID now complies with the Jira-ID format.
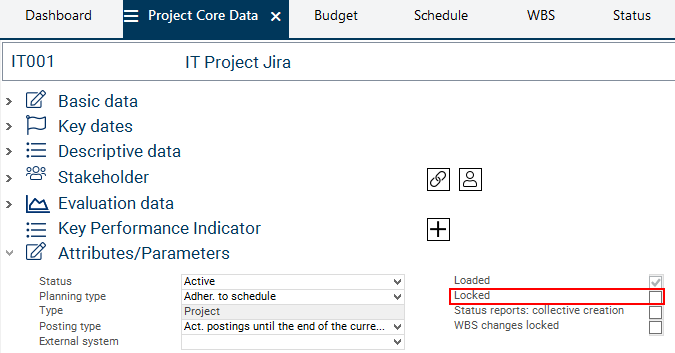
- Deactivate the Locked checkbox in the Attributes/Parameters area.
- Save. The project has now been approved for editing.
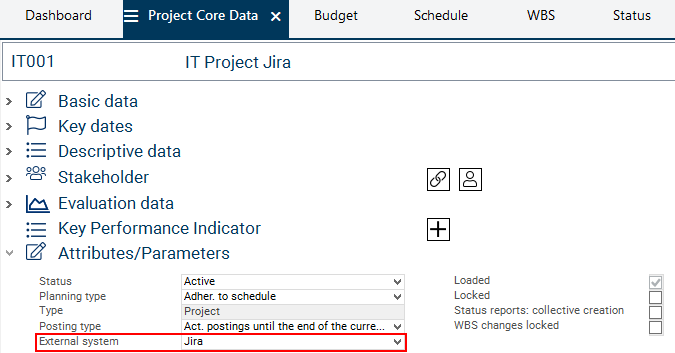
- Select the Jira entry from the External system listbox.
- Save. Jira is now assigned to the project as an external system.
- Switch to the Schedule module.
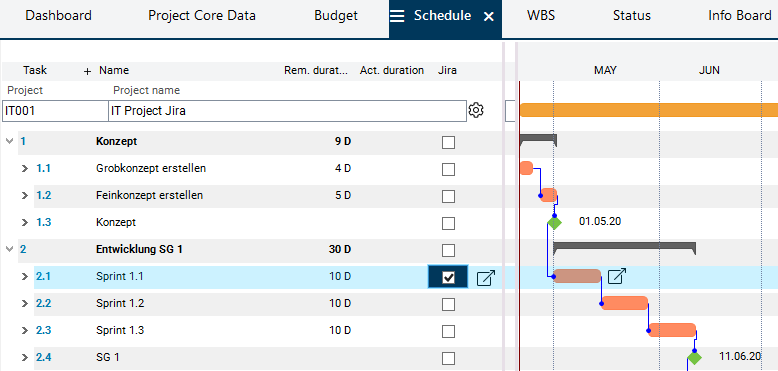
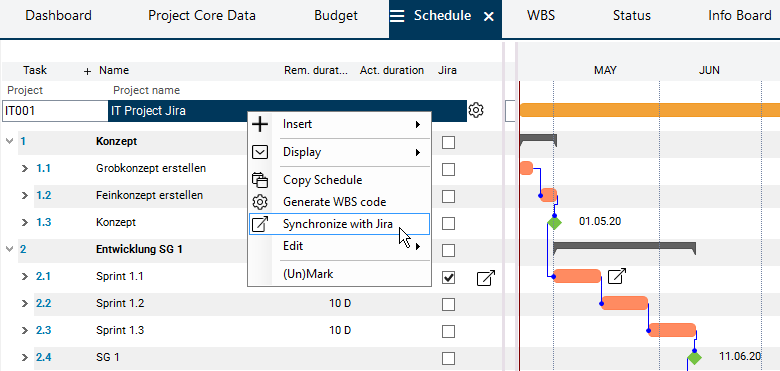
- As Jira has been selected as an external system, the controls that are needed to carry out the synchronization with Jira can now be accessed in the Schedule module of the project:
- the Jira column and
- the Synchronize with Jira context menu entry.
- As Jira has been selected as an external system, the controls that are needed to carry out the synchronization with Jira can now be accessed in the Schedule module of the project:

Synchronize a Project Task
Task
- The outline planning in PLANTA project has been completed and the IT Project Jira project is ready for synchronization. Georg Hart now wants to link and synchronize the Sprint 1.1 project task with Jira, so that he can begin with his agile planning.
Information
- The synchronization of data from PLANTA project to Jira is carried out manually via a context menu command in the Schedule module.
- Once the data from PLANTA project has been initially synchronized with Jira, synchronization must be triggered each time data of objects relevant for Jira were changed to make sure that the respective data is updated in Jira.
- In the reverse direction, synchronization is carried out automatically. If the data defined for synchronization is created or changed in Jira, they are automatically transferred to PLANTA project after saving. This does, however, not apply to the deletion of the objects in Jira. Information on deleted data is not transmitted to PLANTA project.
Detailed information on which data is synchronized in what direction and on the restrictions that apply can be found here.
Procedure
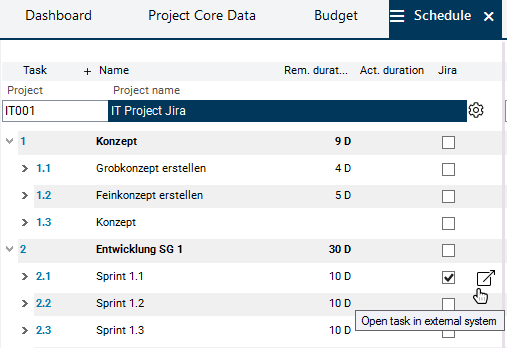
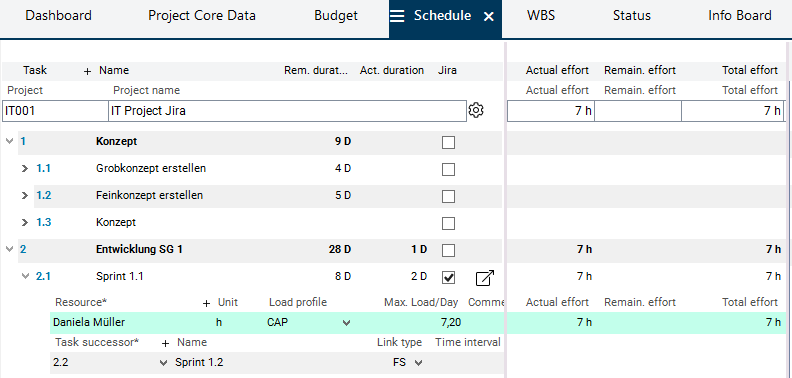
- Activate the Jira checkbox in the record of the Sprint 1.1 task in the Schedule module.
- In the line of the task, the
 symbol is displayed in the 1st window and in the 3rd Window (Gantt chart).
- In the line of the task, the
- Right-click on the project header bar and select the Synchronize with Jira command from the context menu.
- Only the project tasks for which the Jira checkbox has been activated are synchronized.
- As soon as the synchronization is completed, a message will be displayed which informs you whether synchronization was completed successfully or whether problems occurred. In our case, synchronization has been completed successfully.
Jira: Complete Tasks and Record Hours Worked
Task
- Georg Hart would now like to view the synchronized data in Jira.
- He uses the link on the symbol to access the Jira system.
- If Georg Hart is not logged in to Jira yet, the No issues were found to match your search message will be displayed. After successful login, the epic is displayed.
Details
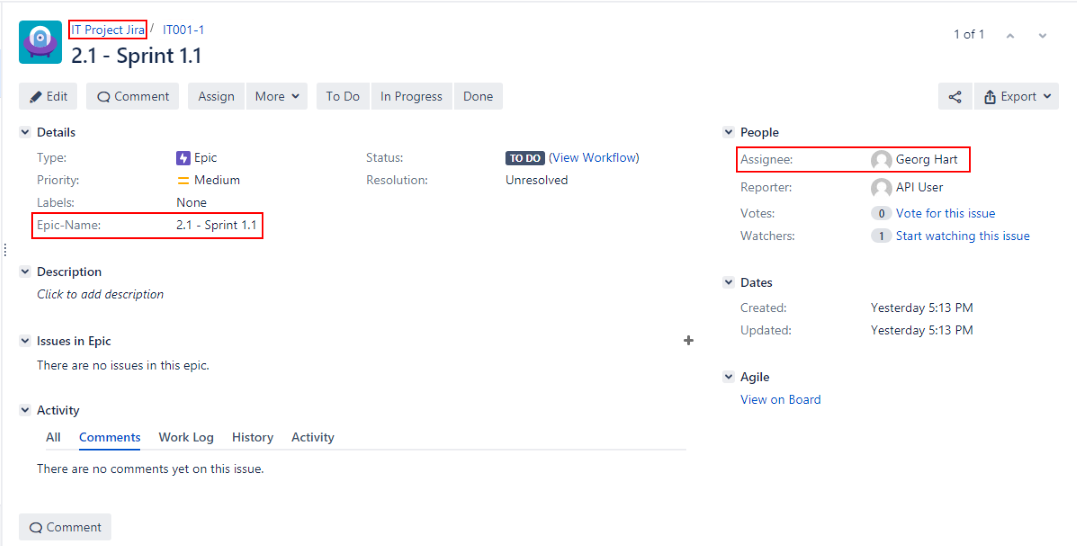
- The following data has been transferred from PLANTA project to Jira:
- Project : A corresponding project was created in Jira.
- Task : The synchronized task has become an epic in Jira.
- Project manager: The project manager (here: Georg Hart) from PLANTA project has become the assignee of the epic in Jira.
Task
- Georg Hart wants to split up the epic in smaller tasks, called stories in Jira, and assign these to the people corresponding to the task resources in PLANTA project.
Procedure
- He creates a story (e.g. Development Feature 1) and assigns it to Daniela Mueller.
- If Daniela Mueller now logs in, she can see the story and start working on it.
Task
- After Daniela Mueller has worked on the story for several hours, she records them in Jira and adds comments to her records:
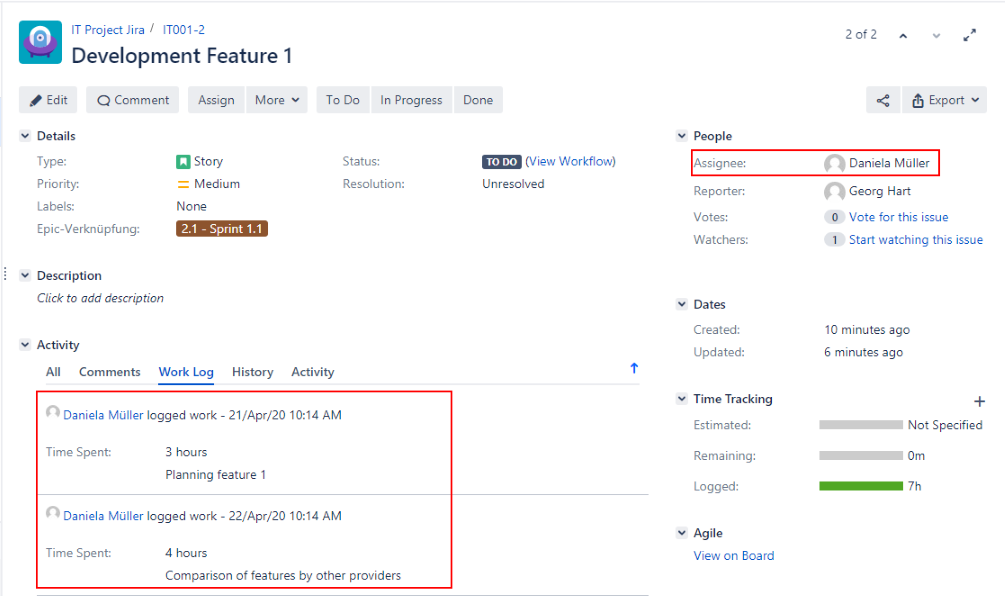
- When saving, the hours are automatically sent to PLANTA project so that the project manager can always see the current data.
PLANTA project Monitor Progress
Task
- Manager Georg Hart wants to look at the hours worked recorded by the project team in PLANTA project in order to be able to estimate the work progress of the Sprint 1.1 project task.
Procedure
- Go to PLANTA project.
- Open the Schedule module of the IT Project Jira project and click on the
 Calculate schedule button.
 - The 7 hours which Daniela Mueller has recorded in Jira are now displayed in PLANTA project.
- To view details on the recorded hours, i.e. the exact loads
- either open the module variant With Loads of the Schedule module
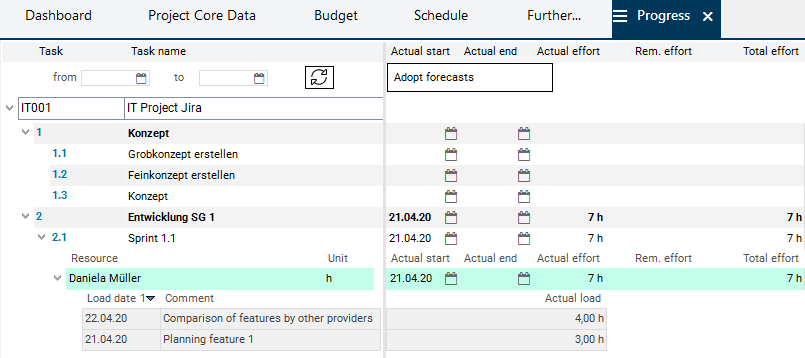
- or open the Progress module (via Further... ).
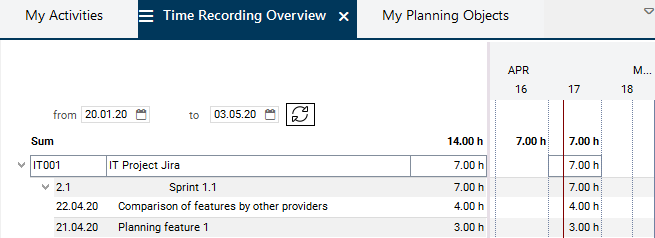
- Unfold the Sprint 1.1 task record and Daniela Mueller’s resource record.
- The individual work loads recorded by Daniela Mueller in Jira are displayed.
Note
- The hours recorded in Jira are also copied to the time recording modules of the reporting employee in PLANTA project, e.g. to the Time Recording and Overview: Time Recording modules.