Data Fields
ID, Input and Output Fields
Information
When data is created, changed and saved, PLANTA distinguishes between:
ID fields: Values can only be entered once and cannot be changed later.
Depending on the customizing settings the IDs can be entered manually in the ident fields or they are generated automatically. Further information...
Input fields: Entries can be changed at any time.
Output fields: Display of information.
Details
When you hover over a record, all input fields of the record are outlined in color.
The active input field is highlighted differently.
Only one input field can be active at a time.
Every click on a new input field deactivates the previous one.
Note
A record remains invalid until all of its ID or key fields are filled.
If several users are editing simultaneously, the changes made by the last user to save will be applied.
Stop
Umlauts and special characters should be avoided in ID fields for the following reasons:
If umlauts are used in ID fields, the records can only be called up by users with umlaut-enabled clients. In international operations, however, this cannot always be guaranteed.
If regular expressions such as * ?![ ] - $ are used in ID fields, when a project is deleted, it is possible that other projects are deleted in addition to the selected project. For example, if a project with the ID 4?11 is deleted, all other projects with a four-character ID starting with 4 and ending with 11 will also be deleted.
Technical notes
Whether and in which colors input fields are highlighted when hovering over a data record can be configured in the client settings, e.g. the behavior can be completely deactivated via the
InputFieldsHighlightingEnabledparameter.
Link Data Fields
Information
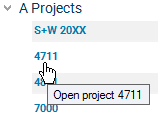
The values of link data fields are displayed as links and are used to start several actions, e.g. starting of modules, macros etc.
If you move the mouse over such a field, the cursor changes its display symbol.
Example
Link on the Project field in the Projects module (Multi-Project Board)
Mandatory Data Fields
Information
Mandatory data fields are marked with an asterisk.
Since in mandatory fields input is obligatory, you cannot save until every mandatory has been filled.
If you try to create a record which contains mandatory fields and try to save without filling the mandatory fields,
either the Mark invalid records? message will be displayed and the entire record will be marked. This means that either the mandatory data fields have not been filled completely or that the manual ID has not been allocated or both
or the Mandatory input not made, saving canceled. message will be displayed. This means that not all mandatory fields have been filled yet. Saving is only possible after the mandatory data fields have been filled.
Notes
For records with mandatory fields and automatic ID generation, the ID will only be generated once all mandatory fields have been filled.
If several users are editing simultaneously, the changes made by the last user to save will be applied.
Example
The mandatory Default cost type and Resource type data fields in the Resource Data Sheet administration module.

Listboxes
Information
A listbox is always a data field which offers a list of values for selection.
By clicking on the pull down button at the right margin of the listbox field or via ALT + down-arrow you can open the listbox and select the required entry.
You can open the listbox module by entering partial strings in the listbox field. Further information on partial string input.
If you have selected a listbox entry and open the listbox module again, the entry is colored, so you can see it immediately.
You can also sort within listboxes.
Via customizing, the listboxes can be set in a way that allows values from the listbox to be copied (input only via listbox).
In this case, the program checks the validity.
If the data field entry is not available in the listbox, it will be removed from the field. The user must repeat the input or open the listbox and select a valid value.
If the data field entry is available in the listbox, it will be copied.
Example
Listbox sorted in ascending order with a selected entry and a tree structure on the Default cost center data field in the Resource Data Sheet module.

Notes
If the listbox is assigned to an ID field, then the pull-down button will be removed from the display as soon as a valid value has been input into the field.
If several users are editing simultaneously, the changes made by the last user to save will be applied.
In listboxes you have the option to display/hide and move columns just like in regular modules.
When unhiding columns, the listbox must be reopened in order for the columns to become visible.
Partial String Input in Listboxes
Information
In data fields which have listboxes, the data displayed in the listbox is to be restricted by specifying partial strings.
Partial strings are data field entries that have not been confirmed.
The string is marked (colored) in the listbox hits.
If a partial string is entered in data fields with listboxes, the partial string functions as a filter criterion with * at the end.
If you enter planned* in the listbox field, all entries which begin with planned will be found.
If you want to show all entries which end on planned, you have to enter *planned in the listbox field.
With the listbox open, the partial string can be further restricted. As a result, the data is changed according to the specifications.
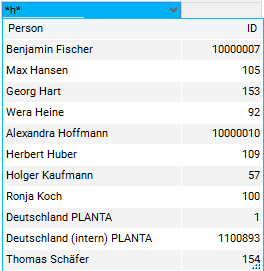
You can also use partial strings with a joker.
Input | string | *String* |
Are Output | All data which contains the string. | All data which contains the string. |
Example |
 |
 |
Notes
Once confirmed (with TAB or ENTER), the entry will no longer be a partial string but a field entry.
If you copy an entry from another data field with Drag&Drop, the entry you have copied will not be considered a partial string.
Notes for customizers
In which fields of the listbox it is searched for the entered string is defined via customizing.
Implicit/Explicit Listboxes
Information
If you use partial strings, there are differences between implicit and explicit listboxes.
Implicit listboxes
are automatically opened when there are less than or precisely 25 hits in the listbox.
have to be opened manually if there are more than 25 hits in the listbox.
Explicit listboxes
do never open automatically, have always to be opened manually. In explicit listboxes, the partial string search is without function.
Whether a listbox is implicit or explicit is defined by the customizer.
Date Listboxes with Calendar Function
Information
In PLANTA project, date data fields are preset with special calendar listboxes which are customized with the Calendar Control function.
Examples
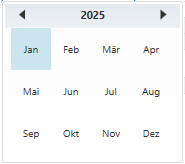
Date listbox on the Requested start field in the Project Core Data module:
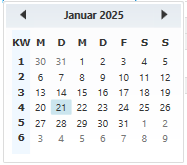
You can switch to monthly view by clicking on the month name.
The current month will then be colored.
Details
By clicking on the calendar symbol at the right margin of the date field or via ALT + down-arrow you can open the date listbox and select the required entry.
There are several views implemented within a calendar which offer the following navigation options:
When you open the listbox, the current month will be displayed in daily view by default.
The current date will be colored.
Using the arrows in the top bar you can navigate to the following or previous months.
by clicking on the required month you can change to the day view.
This function is an alternative to the time intensive scroll between the months in the day view.
From the month view you can change to the annual view by clicking on the appropriate year.
Every view level contains arrows for changing to the previous or following month or year.
How far you can navigate depends on the restrictions in customizing.
As in regular listboxes, date listboxes can be defined via customizing so that only data from the listbox can be adopted.
Notes
In a PLANTA standard system, date listboxes with calendar control are stored on all input date fields.
System-wide three date listbox types are used (depending on start and end dates).
Past to today
Today to future
Past to future
If several users are editing simultaneously, the changes made by the last user to save will be applied.
Checkboxes
Information
Checkboxes are fields which only accept Yes/No values in the form of checked or unchecked checkboxes.
Example
Checkboxes in the Project Core Data module.

Note
If several users are editing simultaneously, the changes made by the last user to save will be applied.
Traffic Light Fields
Objective
To highlight particular fields, e.g. by coloring
Information
The values at which the field is to take another color are stored in the customizing.
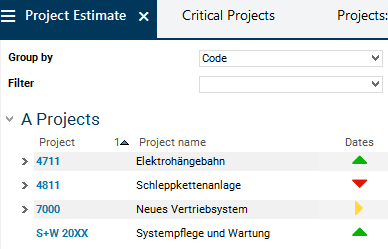
Graphics are sometimes used as traffic light symbols so that the traffic light function is also visible when using black-and-white print.
Example
Traffic light fields for project dates
Continuous Text Fields (CLOBs)
Information
CLOB – Character Large Object – is a database field for storing very long text data.
Details
Continuous texts are stored and managed directly in the database in data fields especially designed for this (CLOB).
When a backup is carried out, no special attention needs to be paid to this data and no extra work is involved, as it has a fixed assignment in the database.
Interfaces to other systems are therefore possible, i.e. continuous texts in PLANTA system can also be edited in other systems.
Notes
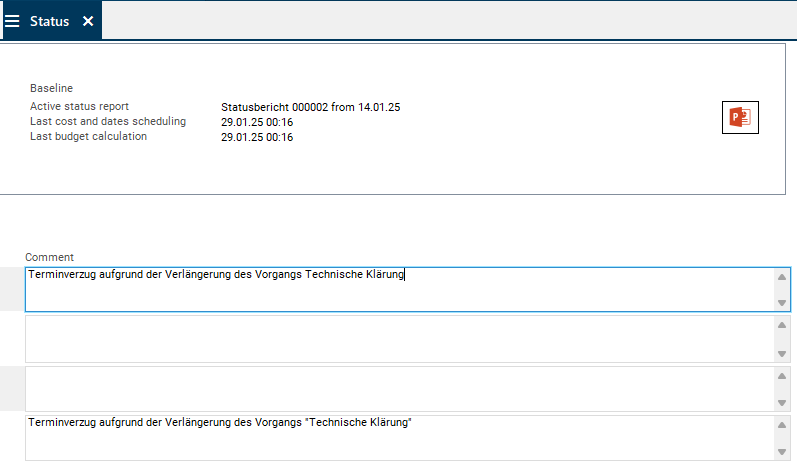
In forms, the height of the continuous text is not automatically adjusted, only the part visible in the field will be displayed. The scroll bar allows the user to see that there is more text below the visible area.
In table areas the continuous text area expands.
When printing, the size of the continuous text field is determined by the data contained in this field.
In continuous text fields, users can enter up to 3000 characters.
If the "Markdown" behavior is set for the continuous text field in customizing, an editor for editing the text to be entered is opened.
If several users are editing simultaneously, the changes made by the last user to save will be applied.
Example
The Comment field without an editor in the Status module.
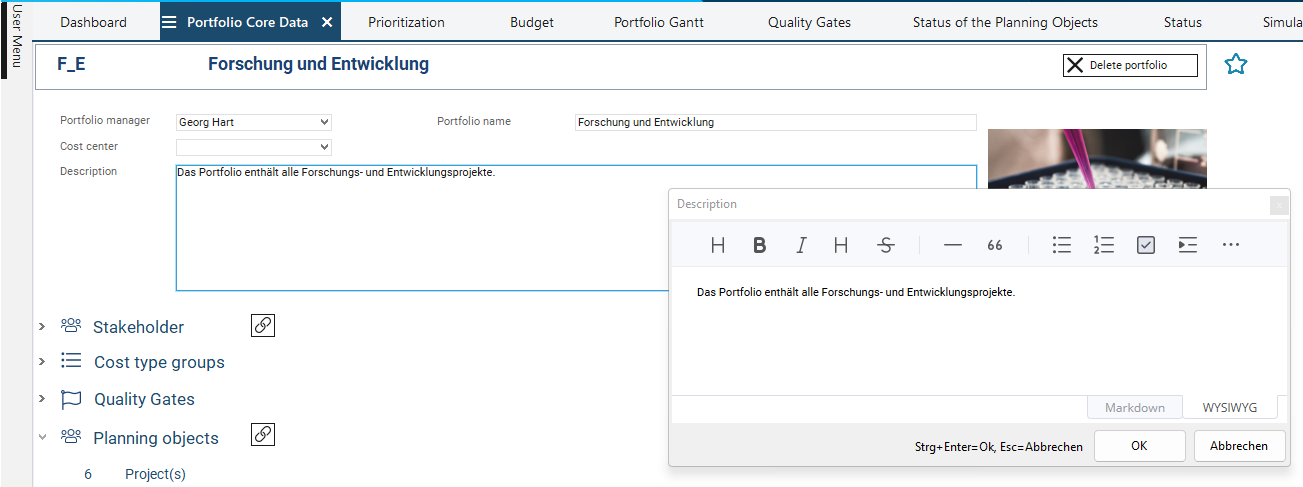
The Description field with an editor in the Portfolio Core Data module.
