Settings Tab
Information
- In the Settings tab of the Administration panel, the settings for various areas (e.g. notifications, permissions) can be configured.
Access path
- Menu → Administration → Settings
Menu Item General
Menu → Administration → Settings → General
Information
- In this area, settings regarding the self-registration of new users and regarding the home page can be configured.
- Furthermore, the upload settings can be configured.
- When opening the tab Settings, the menu General is opened by default.
Registration
Menu → Administration → Settings → General
Information
- In this area, there is a checkbox to define whether new users will be able to self-register in PLANTA pulse.
- If the self-registration is deactivated, new users can only register passively via an invitation link.
- If the self-registration is activated, new users can register actively via the link Register in the login box.
Note
- If this setting is changed, PLANTA pulse needs to be restarted.
Define Home Page
Menu → Administration → Settings → General
Information
- In this area, the home page of the PLANTA pulse system can be defined.
- The home page is the page which is opened after login by default and which can be opened via the PLANTA logo in the Home Bar.
Notes
- In the User Settings → General, users can define their own home page.
- The global setting is only effective if there is no user setting.
- As soon as defined, the user setting overwrites the global setting.
Upload
Menu → Administration → Settings → General
Information
- In this area, information is displayed on how much system storage is taken up by attachments on cards.
- Furthermore, a maximum allowed size per attachment can be configured.
- If an attachment is uploaded which is larger than the maximum size, an error message appears.
- By default, the maximum allowed size is set to 50 MB.
Allowed File Types
Menu → Administration → Settings → General
Information
- In this field, you can define which types of files can be uploaded as attachments in the PLANTA pulse system.
Details
- Enter the allowed file types into the field as MIME Types separated by commas.
- The media type and the subtype are separated by a slash, e.g.
image/png. - Alternatively, wildcards can be used to allow all suptypes, e.g.
audio/*.
- The media type and the subtype are separated by a slash, e.g.
- When the list is left empty, all file types are allowed.
- When opening the text field, the button Set Default Values appears which can be used to insert the recommended default values.
image/ , audio/ , application/pdf, text/plain, application/msword, application/vnd.openxmlformats-officedocument.wordprocessingml.document
Example
- With the default values
image/ , audio/ , application/pdf, text/plain, application/msword, application/vnd.openxmlformats-officedocument.wordprocessingml.document, the following file types are allowed:- All graphic files
- All audio files
- PDF files
- .txt files
- Microsoft Word files
- Open Office files
Blocked File Types
Menu → Administration → Settings → General
Information
- In this field, you can define which types of files must not be uploaded as attachments in the PLANTA pulse system.
Details
- The list of blocked file types has priority over the list of allowed file types.
- Enter the blocked file types into the field as MIME Types separated by commas.
- The media type and the subtype are separated by a slash, e.g.
image/png. - Alternatively, wildcards can be used to block all suptypes, e.g.
audio/*=.
- The media type and the subtype are separated by a slash, e.g.
- When the list is left empty, no file types are blocked.
- When opening the text field, the button Set Default Values appears which can be used to insert the recommended default values.
image/svg+xml
Example
- With the default values
image/svg+xml, the following file types are blocked:- .svg files
- .xml files
User Limit Settings
Menu → Administration → Settings → General
Information
- In this area, information about the current number of users in the PLANTA pulse system is being displayed.
- Furthermore, a user limit can be configured for the PLANTA pulse system.
Details
- In SaaS systems, the Maximum Allowed User Limit indicates which user limit is defined by the SaaS plan.
- If needed, a new user limit can be defined. The new limit cannot exceed the maximum allowed user limit though.
- The new user limit must not be lower than the number of already registered users.
- When the user limit is reached, no new users can be added and users cannot register anymore.
- Inactive users are ignored for the user limit.
Time Frame in Which Redundant Activities Are Deleted
Menu → Administration → Settings → General
Information
- In this area, the time frame in which redundant activities are deleted can be defined.
- Redundant activities are, for example, the editing of a card description multiple times or the adding and removing of labels within a short time frame.
Details
- This setting applies to the activities on boards as well as to the activities which the In-App Notifications are based on.
- 3 minutes are defined by default.
- If, for example, a card description is edited and saved several times by the same user within 3 minutes, only one activity is displayed instead of one activity per saved description.
Menu Item E-Mail
Menu → Administration → Settings → E-Mail
Information
- In this area, the access data and the mail server for sending e-mails out of PLANTA pulse can be configured.
Details
- In this area, the SMTP server and the SMTP port can be edited.
- In the corresponding fields, enter the username and the password.
- Via the checkbox Enable TLS support for SMTP server, TLS support can be activated.
- Via the checkbox Disable Certificate Check, the certificate check can be disabled.
- Deactivating the checkbox is not recommended.
- In the field From, enter a title for the sender from which the mails are sent out of PLANTA pulse.
- Click Save.
- Via the button Send a Test E-Mail to My User a test e-mail can be sent to the e-mail address of the administrator.
Menu Item Design
Menu → Administration → Settings → Design
Information
- In this area, the design of PLANTA pulse system can be configured.
Details
- The following elements of the PLANTA pulse user interface can be adjusted:
- General
- Favicon
- Font
- Header
- Logo
- Background Color
- Program Menu
- Background Color
- Icon Color
- Board
- Default Background
- Default Theme
- General
Procedure
- In order to adjust an element add the URL to the desired file or select the desired color.
- The changes are applied immediately.
- By clicking , the default can be restored.
Menu Item Notifications
Menu → Administration → Settings → Notifications
Information
- In this area, various settings regarding notifications can be configured:
| Collection Period for Notifications | Time in seconds during which notifications are collected before being sent. |
| No E-Mail Notification for the Following Activities | Exclude time recording activities from e-mail notifications |
| Notification Channels | Configure Telegram as a notification channel for PLANTA pulse |
Configure Telegram as notification channel
- In the area Notification Channels, activate the checkbox Telegram.
- By default, the checkbox is deactivated.
- Create a bot for Telegram.
- Copy the Telegram Bot Token in the text field.
- Enter the name of the bot in the field Bot Name.
- Click Save.
- Users can now link their account to the bot and receive notifications via Telegram.
Menu Item Accounts
Menu → Administration → Settings → Accounts
Information
- Via the parameter Allow Changes to E-Mail Addresses, the administrator can define whether users can change their e-mail addresses themselves in the User Settings → Account Settings .
- To do so, select Yes or No depending on the required setting.
- Click Save.
Menu Item Announcement
Menu → Administration → Settings → Announcement
Information
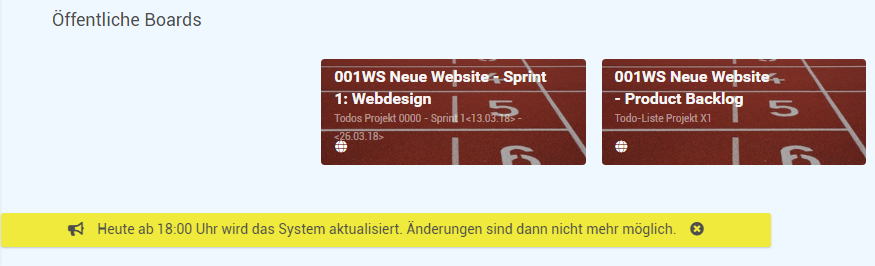
- Via the parameter Activate System-Wide Announcement, the administrator can send a notification for the whole PLANTA pulse system in a yellow bar.
Procedure
- In the field Announcement by Administrator, enter the notification.
- Click Save.
- Activate the checkbox Activate System-Wide Announcement.
- The system-wide announcement is shown at the bottom left until the checkbox is deactivated again.
- Individual users can hide the message by clicking on the next to the message.
Example
Menu Item Modules
Menu → Administration → Settings → Modules
Information
| Enable Linking of Boards and Cards | Define whether linking boards and cards will be possible in general. When this parameter is activated, you can configure whether linking boards and cards will be possible in the individual projects under the Projects menu item or in the Projects panel. |
| Enable Debugging for Attachment Upload (CollectionFs) | Define whether information required for debugging is written into the logs during the upload of attachments. |
| Allow Moving and Copying of Cards to Other Projects | Define whether cards can be moved or copied to boards in other projects. Moving cards may result in broken links. You will need to update all outdated links manually. |
| Disable Comment Editing | Define that comments cannot be edited or deleted anymore after a certain period of time. Working hours can always be edited later and are not affected by this parameter. |
Disable Comment Editing
- Menu → Administration → Settings → Modules
- Activate the parameter by using the slider.
- By default, the comment editing is now disabled after 5 minutes.
- If needed, enter a new number in the text field (for decimal numbers, use the format 0.5).
- If you enter 0 minutes, comment editing will be disabled immediately.
- Click Save.
Menu Item Permissions
Menu → Administration → Settings → Permissions
Information
- Via the Board Restrictions, restrictions for external users can be activated.
- External users can then only access boards for which they have explicit access rights, since they were invited onto them. External users cannot see any public boards, join any boards or create new boards.
- In order to activate the Board Restrictions, an internal domain needs to be set.
- Via the parameter Set internal domain(s), an internal domain can be configured.
- Via the internal domain, internal users can be separated from external users.
- When an internal domain is defined, restrictions take effect (see below).
Notes
- By default, the domain of the first user in the system is set as the internal domain.
- It can be edited or deleted later in the field Set internal domain(s).
- As soon as an internal domain was configured, the following restrictions take effect:
- External users cannot access time recording in PLANTA pulse.
- External users cannot create projects.
- If this is not desired, the internal domain can be deleted in the field Set internal domain(s) or more domains can be added.
Menu Item PLANTA Hybrid
Menu → Administration → Settings → PLANTA-Hybrid
Information
- In this area, various settings regarding PLANTA Hybrid can be configured.
API Token
Information
- In this area, an API token from PLANTA project can be entered in order for PLANTA pulse to authenticate with PLANTA project systems from DB 39.5.18 onwards.
- The API token can be generated in PLANTA project in the PLANTA pulse and PLANTA Hybrid Parameters module.
Comment Format Template
Information
- With the comment format template, time recording comments can be synchronized from PLANTA pulse to PLANTA project in the required format.
Edit format template
- Click on next to Customize Your Template.
- A dialog box to edit the format template opens.
Here, enter the required placeholders (e.g.
{card-key}, or{project-key}).- Possible placeholders are shown in the dialog box. Via , an example can be viewed.
- Click Save.
Note
- The comment format template can also be edited for individual projects.
Time Recording on Cards of Unsynchronized Boards
Information
- The option Enable Time Recording on Cards of Unsynchronized Boards can be used to configure whether hours worked can be recorded on cards of unsynchronized boards.
- When using PLANTA Hybrid, these hours worked will not be sent to PLANTA project. PLANTA therefore recommends deactivating this option when using PLANTA Hybrid.
- By default, the option is activated.
Note
- Using the option Disable Time Recording in the board menu of a board, the time recording can also be disabled for individual boards.
Extended Time Recording
Information
- This area contains settings for the extended time recording for PLANTA Hybrid.
- The extended time recording allows for the time recording directly on PLANTA project elements (e.g. tasks) in addition to the time recording on PLANTA pulse elements.
- Please contact your PLANTA consultant if you want to use the extended time recording.
Details
- The option Activate Time Recording on PLANTA project Elements needs to be activated in oder to use the extended time recording for PLANTA Hybrid. After activating the option, further settings are being displayed:
- The displayed presence time can be recorded in PLANTA project or in PLANTA pulse.
- If you want to record presence time in PLANTA pulse, this requires at least the Stable 3 of Server 39.5.29 of PLANTA project.
- The parameters need to be configured for the extended time recording for PLANTA Hybrid.
- The parameters can also be configured in the Meteor Settings. If, however, new information is entered in the Administration panel, it will overwrite the settings of the Meteor Settings.
- Display Presence Time: If the option is activated, presence time will be displayed in the Time Recording panel.
- Record Presence Time: If the option is activated, presence time can be recorded in PLANTA pulse in the Time Recording panel.
- PLANTA project System: Here, protocol, host and port of the connected PLANTA project system are configured. There is also an indicator showing whether the system is available.
Menu Item Time Recording Settings
Menu → Administration → Settings → Time Recording Settings
Information
- The parameter Time Recording Data of All Users defines whether the time recording of all users is displayed.
- If this parameter is deactivated, every user can only see his/her own time recording on cards.
- The Time Recording Below the Scale parameter can be used to configure whether time recording is possible directly below the scale.
- When this setting is activated, hours worked can be recorded directly below the scale.
- When the setting is deactivated, a time recording dialog, in which hours worked can be recorded, is opened when clicking below the scale.
- Users can (de)activate the time recording below the scale in the User Settings → Time Recording Settings, if needed.
- Furthermore, the time format for recording time in the Time Recording panel can be configured.
- Available options are the decimal format (e.g. 2.5h) or the HH:MM format (e.g. 02:30h).
- When recording time directly on cards, both formats can always be used.
- The format configured here is overwritten by the individual User Settings of a user.
Menu Item System Colors
Menu → Administration → Settings → System Colors
Information
- In this area, the colors which are available for labels and background colors and for the custom field card color on the boards can be edited.
- In the area Color Palettes, the colors can be assigned to different color palettes and use cases.
Details
- In the upper area, the standard colors are displayed. These cannot be edited.
- In the area Custom Colors, individual colors can be added.
- The setting Allow Custom Board Labels defines whether users can create new colors for labels directly on boards.
Create color
- Click the button Create New Color.
- Enter a title for the color and a hexcode.
- The field Preview displays the color.
- Click Create New Color.
- The color is now displayed in the area Custom Colors.
Menu Item Color Palettes
Menu → Administration → Settings → Color Palette
Information
- In this area, the colors which are available for labels and background colors and for the custom field card color on the boards can be edited.
- The colors which can be assigned to the color palettes, can also be edited in the Systemfarben area.
Details
- At the top, the standard palette which is used by default is displayed.
- This palette cannot be edited or deleted.
- The icons on the right indicate the use case of the color palettes ( for labels, for background colors and for custom fields).
- Via , a menu with further options can be opened for the individual color palettes.
Add New Palette
- Click on the next to the heading Edit Color Palettes.
- An empty color palette is added at the bottom.
- Click Insert Title to enter a title for the color palette.
- Via the menu with further options can be opened.
- The options Labels or Custom Fields define what the colors of the palette should be used for.
- The option Empty Palette can be used to remove all colors from the palette.
- Via the in the right corner, the palette can be deleted.
Add colors to a color palette
- Click on the in the area of a palette.
- In the upper area, the standard colors are displayed. These can be selected with a click.
- Via the button Select All Default Colors, all default colors can be selected.
- In the bottom area, the custom colors are displayed.
- Here, new colors can be created as well.
- New colors can also be created and edited in the Systemfarben area.
- When all required colors have been selected, click Add Colors.
Create new color
- Click on the in the area of a palette.
- Click Create New Color.
- Enter a title for the color and a hexcode.
- The field Preview displays the color.
- Click Create New Color.
- Custom colors can also be managed in the Systemfarben area.
Notes
- When new color palettes are created for labels or for the custom field card color, the previous palettes on existing boards will not be replaced.
- Only boards which are created after the change will receive the new color palettes.
- Changes which are made to color palettes will also only affect boards which are created after the change.
Menu Item Custom Fields
Menu → Administration → Settings → Custom Fields
Information
- In this area, custom fields can be created which will then be available in all projects in PLANTA pulse.
- Custom fields can be used to add further individual fields to projects, boards and cards.
More information on custom fields
Create custom field
- Click the .
- Enter a title for the new field.
- In the Available on listbox, select the objects on which the field is supposed to be available.
- In the Type listbox, select the desired field type.
- If needed, change the visibility settings.
- For fields on boards:
- Display Field in Preview: Defines whether the field is to be displayed on the board card once a value has been entered.
- For fields on cards:
- Display Field: Defines whether the field is displayed in the detail view of all cards by default.
- When deactivated, the field first needs to be added to the card via the card menu.
- Display Field in Preview: Defines whether the field is to be displayed on the card preview once a value has been entered.
- Display Field: Defines whether the field is displayed in the detail view of all cards by default.
- For fields on boards:
- Click Save.
Custom fields can be created globally in the Administration panel, per project in the Projects panel or per board via the board menu. More Information
Menu Item Microsoft 365
Menu → Administration → Settings → Microsoft 365
Information
- In this area, OneDrive attachments for cards can be activated.
Details
- When this feature is activated, attachments can be linked onto cards directly from OneDrive.
Notes
- A OneDrive Business account is required to use this feature.
- Furthermore, the Azure administrator needs to grant the necessary permissions to the PLANTA pulse system.
More information on the Microsoft 365 integration
Menu Item API Settings
Menu → Administration → Settings → API Settings
Information
- In this area, the default version of the REST API can be selected.
- This version will be called if no explicit version is included in an API call.
- Via the Enable Make setting, the integration with Make can be activated.
- When this setting is activated, Make can access the REST API of PLANTA pulse. (More information on the Make integration)
- Via the Enable webhooks setting, Webhooks can be activated on the REST API.
- The Print webhook debug logs setting can be used to configure whether debug logs for webhooks are to be printed.
- Where the logs are printed depends on the logger configuration.
- If PLANTA pulse is to be linked with a PLANTA project system < 39.5.18, the API version 1.0 needs to be configured.
Menu Item Application Logs
Menu → Administration → Settings → Application Logs
Information
- In this area, the logs of the application can be viewed and deleted, if needed.
Note
- In order for logs to be displayed in this area, the logger needs to be configured to save logs in the MongoDB.
Details
| Reverse Log Order | By default, the parameter is activated and the newest log entry is displayed at the top. If the parameter is deactivated, the oldest log entry is displayed at the top. |
| Fatal | Display logs with the log level Fatal. By default, the parameter is activated. |
| Errors | Display logs with the log level Error. By default, the parameter is activated. |
| Warnings | Display logs with the log level Warning. By default, the parameter is activated. |
| Debug | Display logs with the log level Debug. By default, the parameter is deactivated. |
Delete logs
- Menu → Administration → Settings → Application Logs
- Click the button Delete All Logs.
- Confirm the dialog message by clicking Delete.
- All logs are deleted from the MongoDB.